Whether you’re catching up with friends, scrolling through your newsfeed, or staying in the loop with current events, Facebook is a platform you know well. But did you know that beyond the likes and shares, Facebook is also a powerful tool for businesses to connect with their ideal audience? With billions of active users around the globe, Facebook offers an unparalleled opportunity for businesses to reach and engage with a vast and diverse audience.
Facebook advertising isn’t just for big brands—it’s a game-changer for businesses of all sizes. By crafting the right strategy, you can create highly targeted ad campaigns that connect with potential customers and drive real results. Imagine reaching the people who are most likely to love your product or service, right where they spend their time online.

How To Advertise on Facebook?
1. Set Up Your Facebook Ads Manager Account
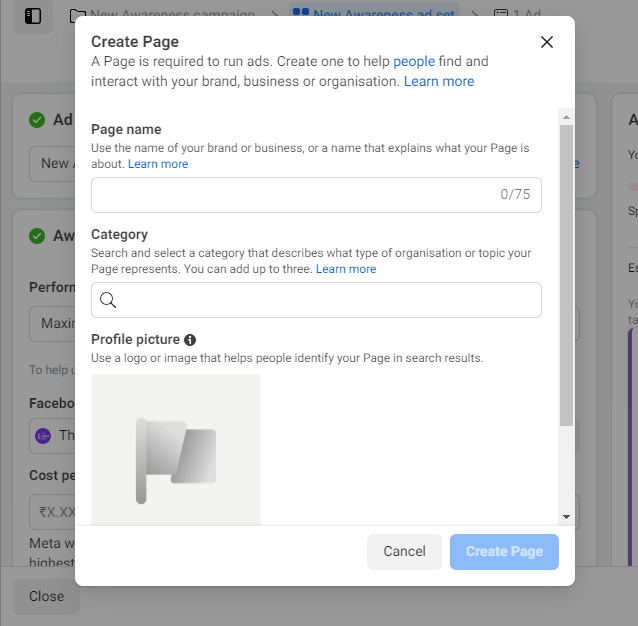
- Go to facebook.com/business and click on “Create Ad”
- If you don’t have an account, click “Create Account” and follow the prompts to set one up
- Once you have an account, proceed to “Create a Page”.
- If you don’t have a Page for your business, follow Facebook’s steps to create one.
- Once created, your Page will automatically be linked to an ad account.
2. Create Your Ad Campaign

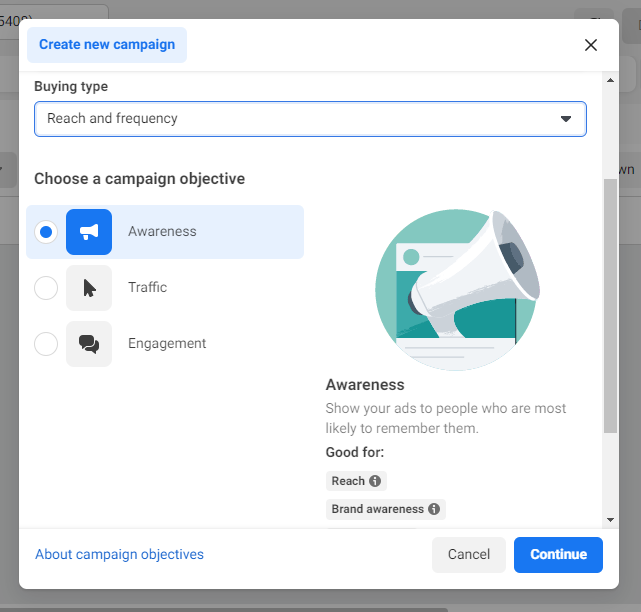
- Click the “Create” button in Ads Manager
- Select your campaign objective (e.g. Awareness, Traffic, Engagement, etc.)
- Give your campaign a name and click “Continue”
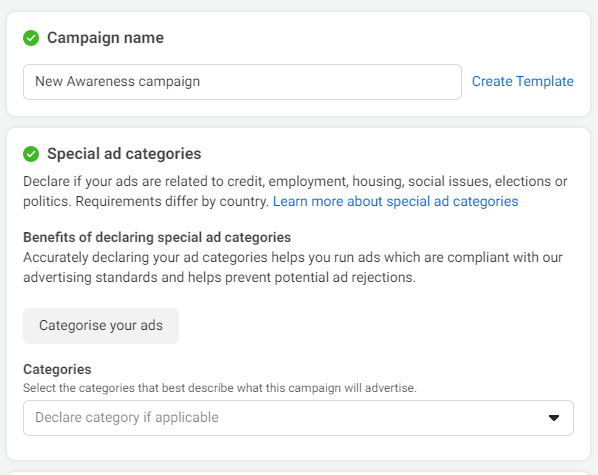
- Name your campaign and select your ad category.
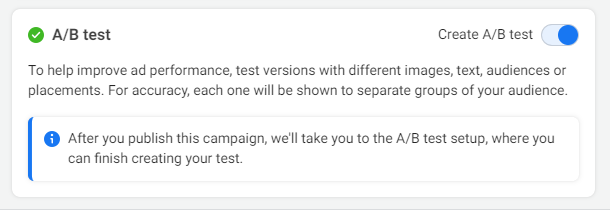
3. Enable A/B Testing
- Locate the A/B test toggle within your campaign setup.
- Turn on the A/B test feature to allow Facebook to test different variables like images, text, audiences, or placements.
- Remember that the full setup for A/B testing, including the specific variables you want to test, will be configured later in the process.
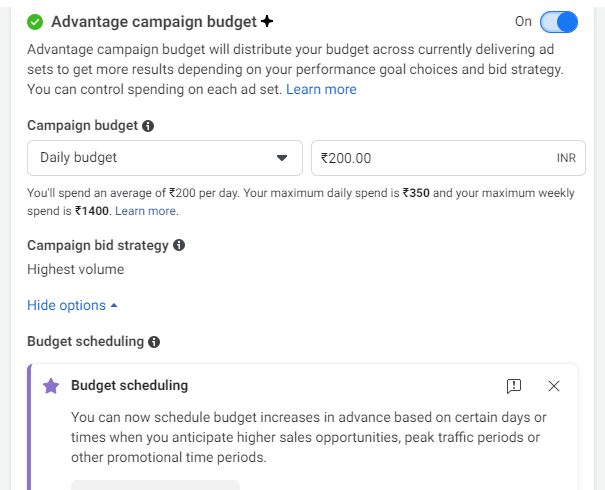
4. Turn On Advantage+ Campaign Budget (Optional)
- Find the option for Advantage+ campaign budget within your campaign budget settings.
- Turn on this feature to allow Facebook to automatically distribute your budget in real-time across your ad sets, finding the best opportunities for results.
- This feature helps optimize your campaign by focusing on the ad sets that are performing best, maximizing your ROI.
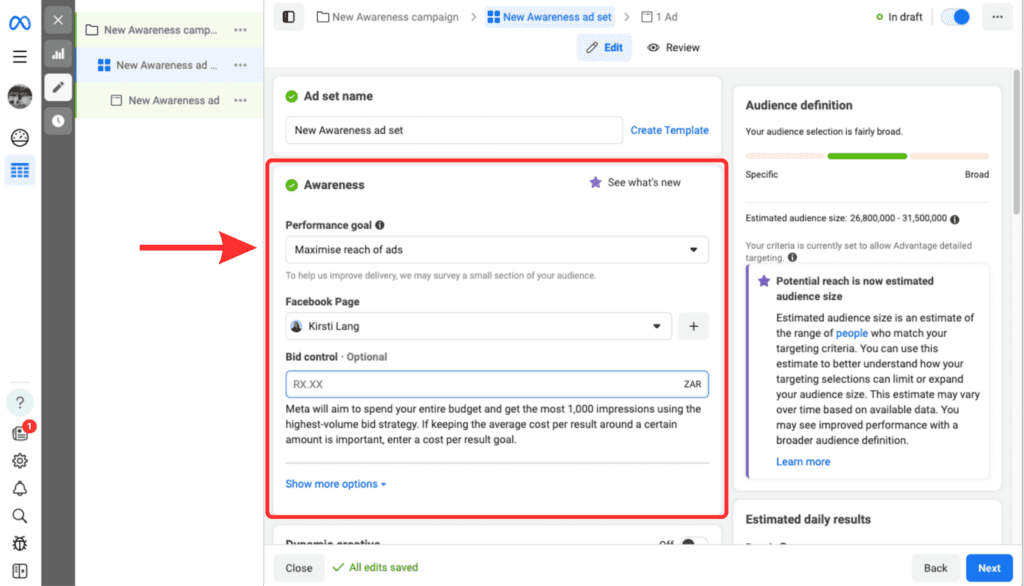
5. Narrow Down Your Performance Goal
- Once you click Next, you will be taken to a page where you can select your performance goals according to your chosen campaign objective.
- For instance, if you selected Awareness, you can narrow it down to broader targets like “Maximize reach” or more focused targets like “Maximize two-second continuous video views.”
- If you’re new to Facebook Ads, consider starting with broader goals to gather data before moving on to more specific targets that align with your objectives and content.
Source: Buffer
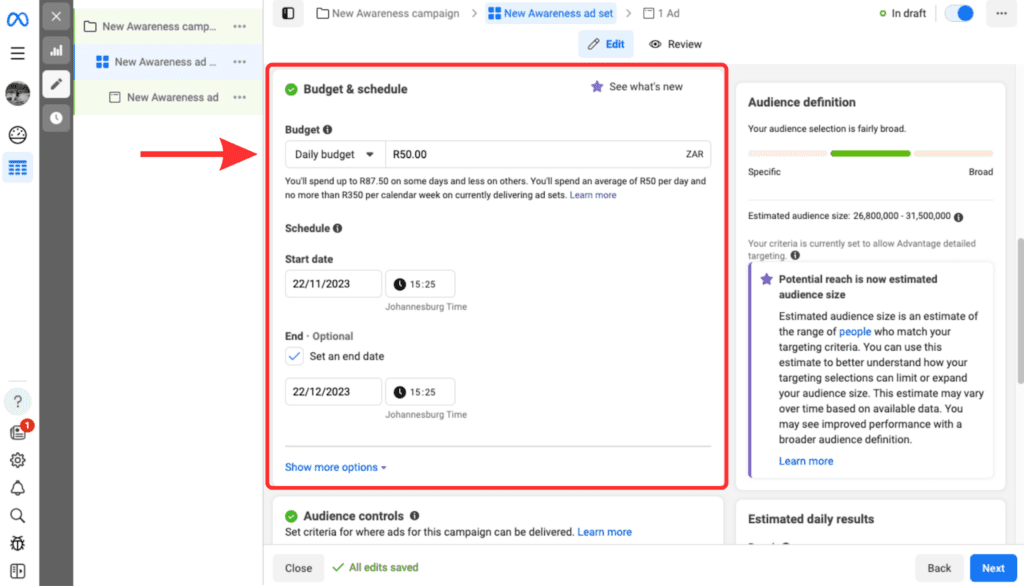
6. Define Your Ad Spend and Schedule
- Next, decide whether you want to set a Daily or Lifetime budget for your campaign.
- Daily Budget: Set a limit on what you’ll spend each day. Facebook will optimize the timing and placement of your ad within this budget. Once the daily budget is reached, ads stop for the day and resume the next day.
- Lifetime Budget: Set the maximum amount you want to spend over the entire campaign period. Facebook will allocate this budget based on performance, stopping the campaign once the budget is exhausted.
- Set the schedule for your campaign, choosing specific start and end dates, or allowing Facebook to optimize the schedule for the best performance.
- Review your budget and schedule to ensure they align with your campaign goals and expected outcomes.
Source: Buffer
7. Customize Your Target Audience
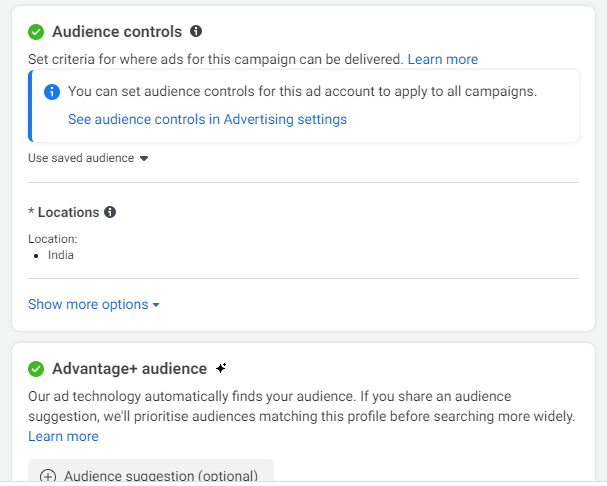
- In the “Audience” section of Ads Manager, you’ll now see options to define your audience by Location, Age, and Language. Select the appropriate options for your target market.
- You can rely on Meta’s AI to automatically find your audience or refine your target by adding specific details, such as age range, gender, and interests. Meta will prioritize targeting these specified audiences before broadening the search to achieve optimal results.
- If you prefer broader targeting, use the Advantage+ Audience feature, which allows Meta’s AI to search within a wider audience for the best performance.
- For more control, you can still use Custom Audiences by switching back to the original audience options. Look for the option in Ads Manager to revert to the previous audience customization settings if you want to regain access to detailed targeting options like behavior and interests.
8. Choose Your Ad Placements
Deciding where your ad will appear is crucial to its success, and Meta’s updated placement tools offer both automated and manual options:
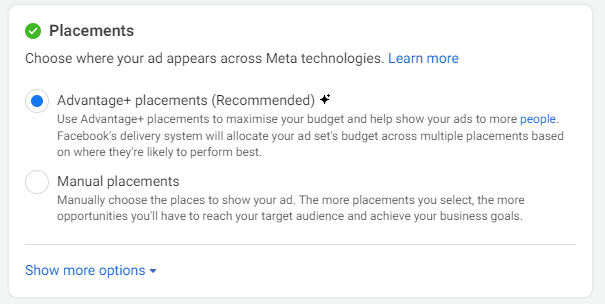
- In the Ad Placement section, decide whether you want to use Advantage+ Placements or Manual Placements.
- Advantage+ Placements: Meta’s AI will automatically select the best placements to maximize your ad’s reach and performance across Facebook, Instagram, and the Audience Network.
- Manual Placements: Choose this option if you want to control where your ads appear.
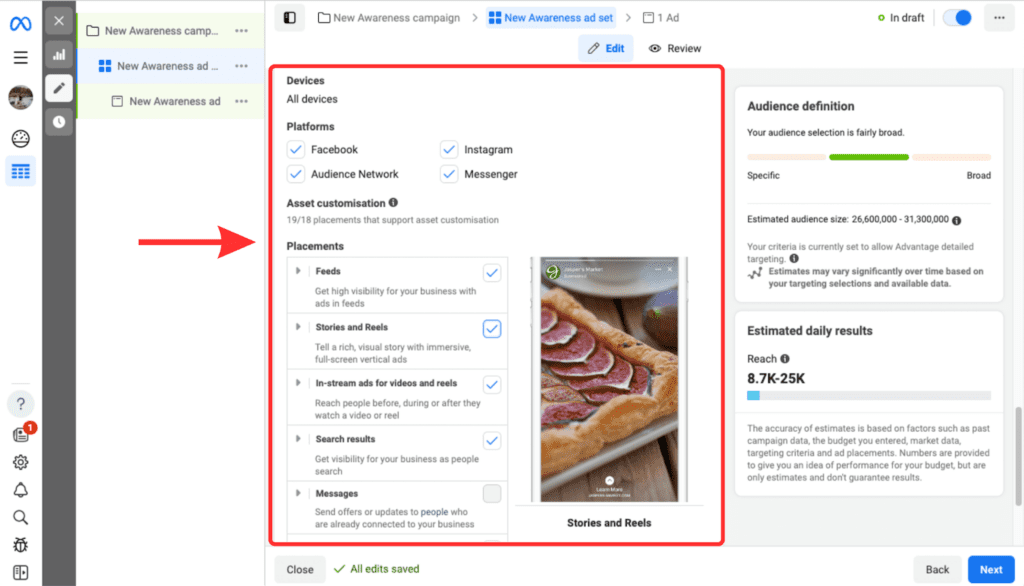
Source: Buffer
- Review your selected placements to ensure they align with your campaign goals and target audience preferences.
9. Choose Your Social Accounts
- In the next window, select which Meta social media profiles (such as Facebook, Instagram, or Messenger) you want your ads to run on.
- Ensure the selected accounts align with your campaign goals and target audience.
10. Choose Your Ad Format
- Under “Ad Setup,” choose whether to create a new ad, use an existing post, or select a mock-up from Meta’s Creative Hub.
- Pick your ad format.
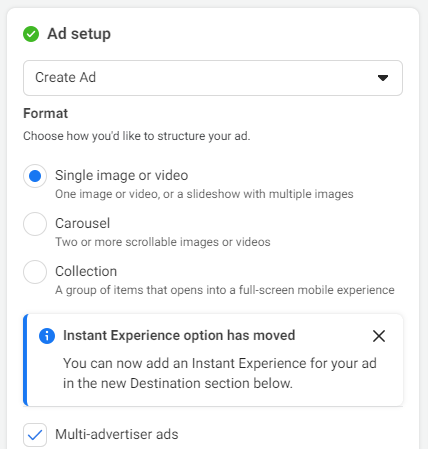
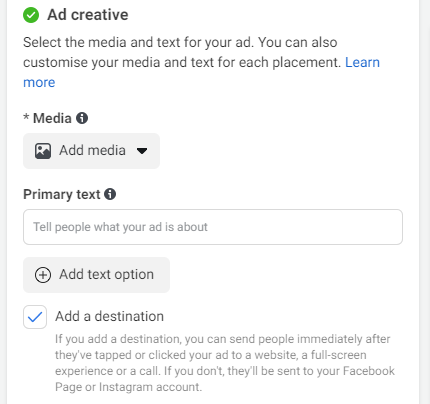
11. Choose Your Media and Write Your Text
- In the Ad Creative box, review the media pulled from your Facebook page or change it by clicking the Edit drop-down.
- Upload your images or videos for your chosen format (carousel ads, video ads, etc.).
- Customize your ad copy and creative assets for each section of the Meta apps if you want to tailor the user experience per platform.
- If applicable, select music for formats that support audio (refer to trending Instagram audio for inspiration).
- Add compelling ad copy, including a clear call-to-action (CTA) to drive engagement.
12. Choose Your Destination
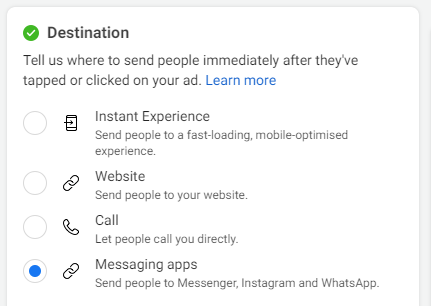
- Choose from various destination options from the option given below:
- Instant Experience (formerly Canvas): A fast-loading, mobile-optimized experience that keeps users within the Facebook app.
- Website Link: Direct users to your website, where you can add a UTM tracking parameter.
- Messenger/Instagram/WhatsApp: Send users directly to your inbox for further engagement.
- Configure your destination settings to align with your campaign objectives.
13. Publish Your Ad
- Click the “Publish” button in the bottom right-hand corner of the page.
- Facebook will review your ad to ensure it meets their guidelines. This review process typically takes up to 24 hours.
- Once approved, you’ll receive a confirmation email, and your ad will go live!

